GODZILLA Rally/Raid RACE installation LC8 - RC8 990 1050 1090 1190 1290
THIS IS A RACE ONLY FUEL SYSTEM UP-GRADE, in some countries it may not be street legal !
GODZILLA Rally-Raid RACE installation is totally under your personal responsability, should you not feel comfortable tinkering with the fuel system, let your mechanic do it for you.
Should you have any further doubts about GODZILLA Rally-Raid RACE installation or special in-filter compatibility, please talk to your mech or contact us first!
First things First:
The easy part, here below one of the many youtube instructions on how to service the KTM LC8-RC8 fuel pump:
KTM ADV Adventure 990 fuel pump
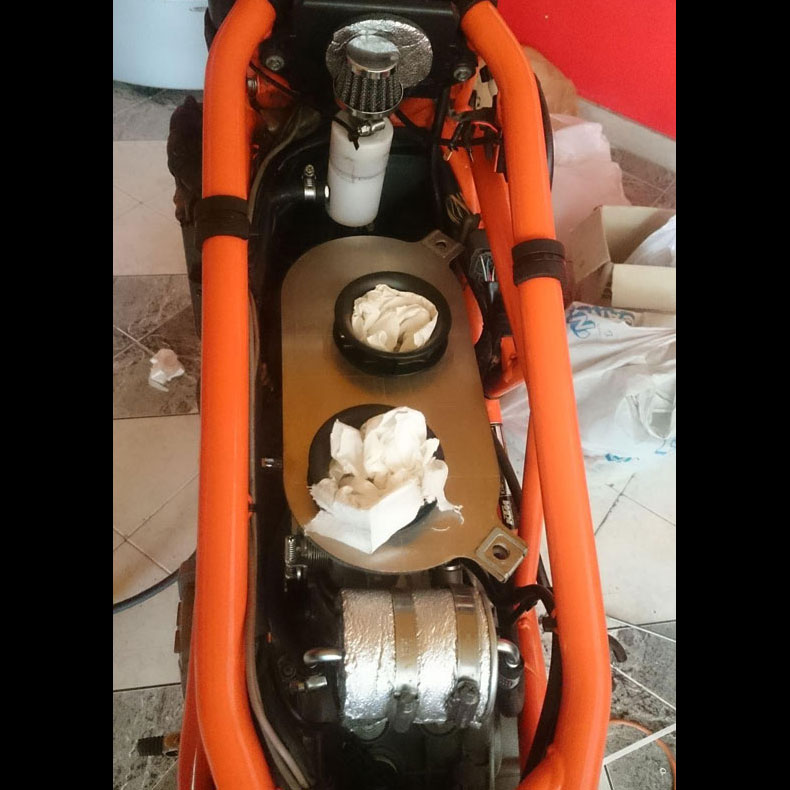
Before taking down the pump, take a pic on how it’s mounted/oriented on the tank, not all the models have the same orientation, so be aware !!!!
As described many times, all fuel pumps on the big bore KTM are based on the same design. Some have the integrated fuel level sensor, some other have a different base plate, the new generation (not the RC8 though) have a different fuel pressure regulator, but pump unit and fuel filters are the same and therefore MUST BE ELIMINATED to free the pump from a nasty death and also free it’s true potential :)
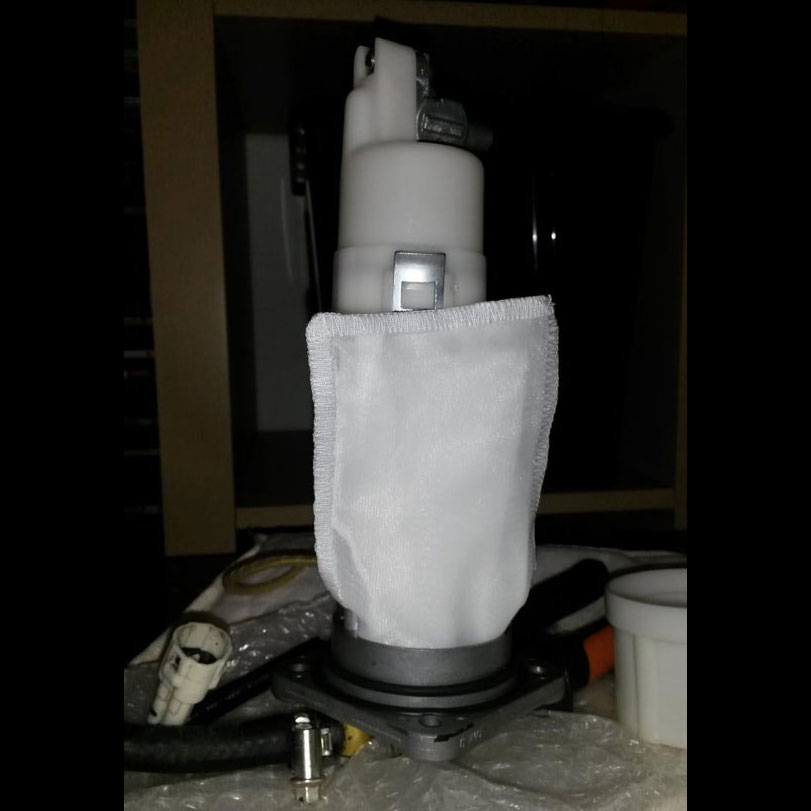
Both original filter have to be removed, the pre-pump teabag will be swapped for the Godzilla HUGE High Flow fuel filter, and the paper joke will be eliminated and its function taken over by the MASSIVE in-line external unit.
The system - GODZILLA Rally-Raid RACE - has been designed by Guglatech to be maintanance free, therefore we recommend you to install new o-rings and forget forever about that :)
WARNING:
Do not use grease to “oil” the o-ring while mounting them, they will get the Godzilla dirty for nothing, use only clean motor oil or tech-vaselin pure oil, NO GREASE ALLOWED INSIDE THE TANK GUYS!!!
Avoid Silicon oil if you still have the CAT, it damages its function…… you really still have the CAT ??? on a 990?? LAME !!!!!
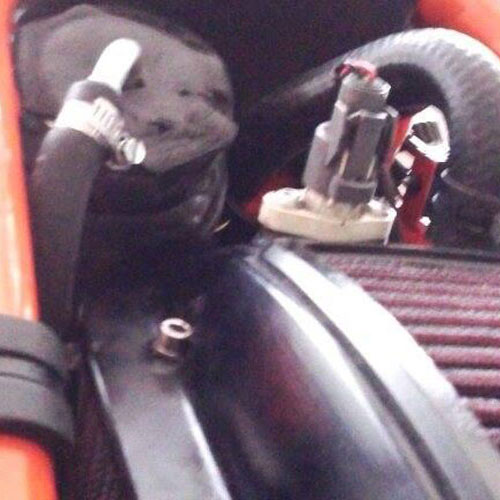
The black arrow at the bottom of the goose neck indicates how to orient Godzilla properly once mounted on the pump, Godzilla is much bigger than original, it will require a bit more attention.
Use a rubber hammer, once the position is correct, to ram down the filter properly, it is harder to fit than the original one, tighter fit, so much better for pump protection :)
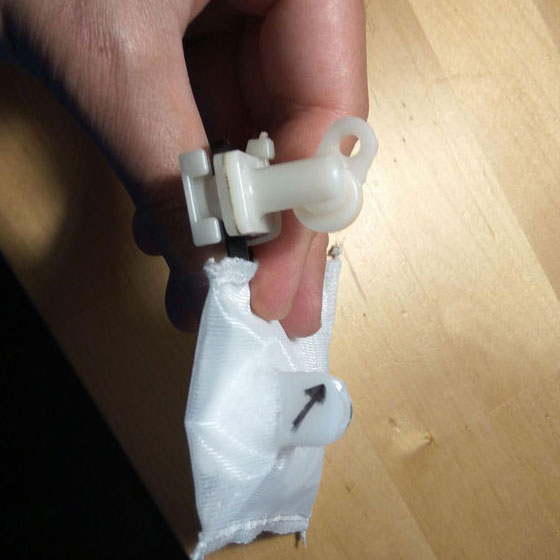
Lower corners of the Godzilla must be folded internaly facing the pump to create a “free-flow” area, it won’t make any difference since 90%+ of the whole flow will come from above due to its special ribcage design, but still, we take care of all the details!
All old o-rings should be washed with fresh oil and put aside, they may come useful later on, the small one on the paper filter is compatible with the quick-diconnect of the fuel hose :)
On the table you will have the following parts remaining after fuel pump-rebuild:
-inside mini paper filter,
-mini paper filter spring,
-teabag filter,
-all old o-rings olied and ready (paper bag is recommended to allow all fuel fumes to leave the o-rings so that they will shrink back to the original size unless damaged or in bad shape)
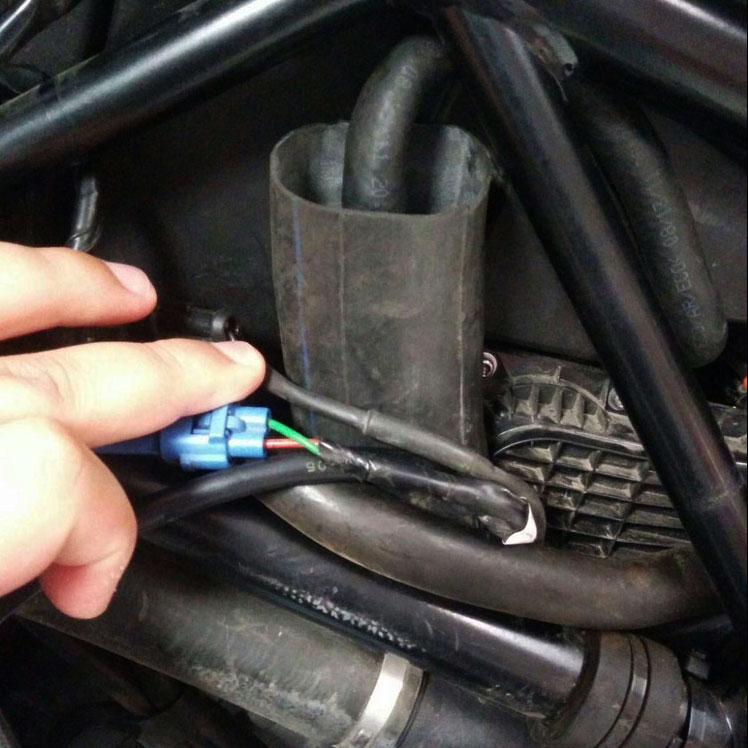
Use a good strong Nylon (PA66 is the commercial type) cable tie to secure down the metal clips, its design is prone to fail and spring open again leaving you with no pressure and stranded in the middle of the street :)
Putting the cable tie will force you to double check the clips position and they will have no place to go :)

While inserting the fuel pump back into the tank, motor oil on the o-rings, and make sure NOT TO pinch the radial one creating a leak point!!!
Now, different positions for the different special filters we have selected in our long experience on LC8 Engines/Frames.
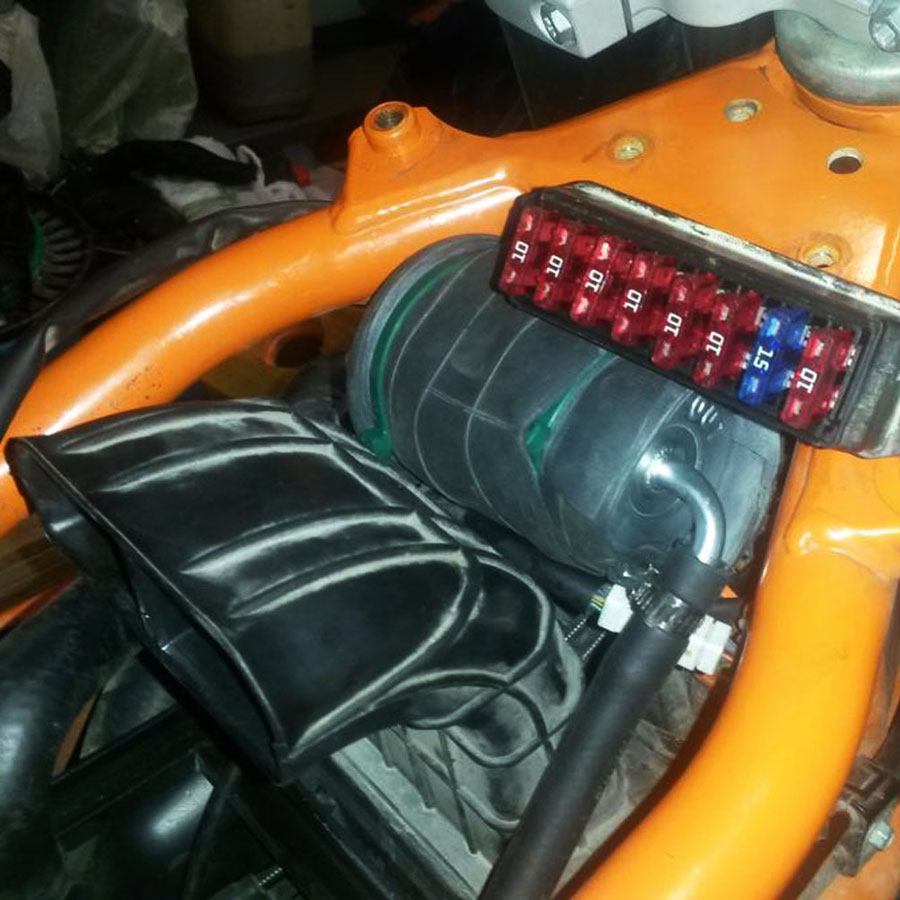
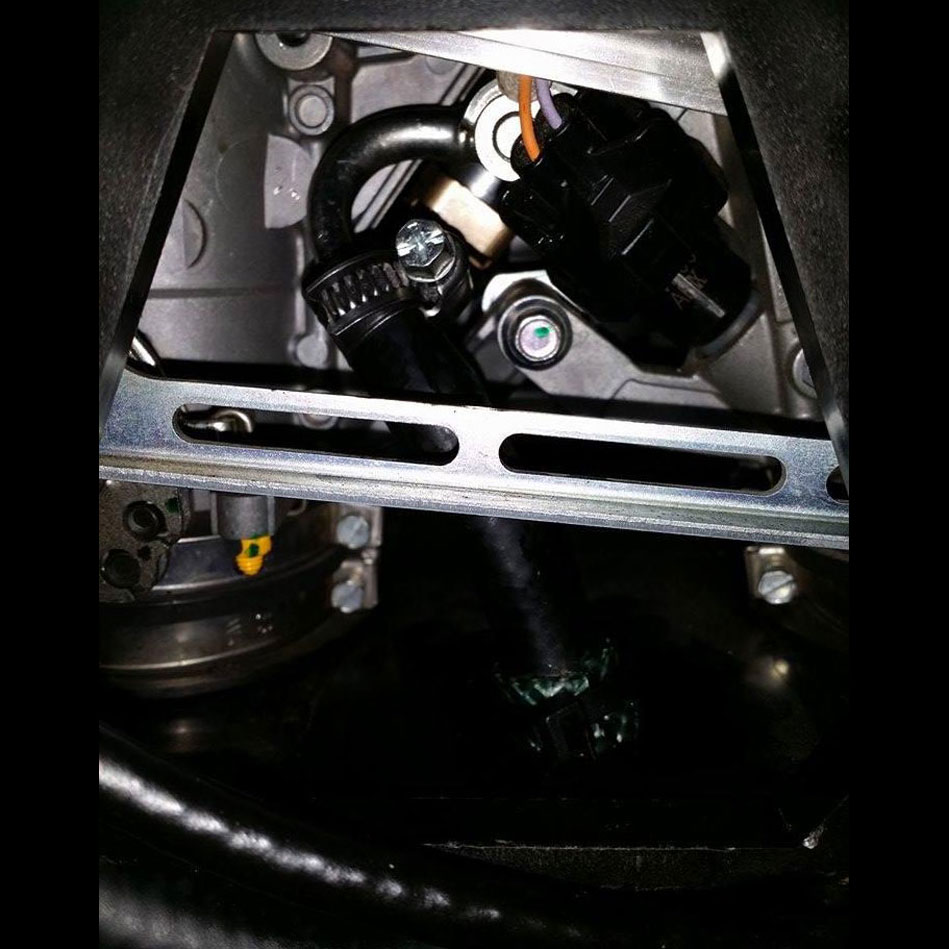
ADVENTURE 990: all years - note the position of the massive filter with 90 degr bent in (left) and out (right) 8mm “pipes”,
ADV 990
ADV, SM/SMR/SMT/SM/SD no Airbox
You can see that the combinations are infinite, depending on the filter type, its size, your Airbox combination and position choice.
We have also auto-pourging unit for the SM/SMR/SMT/SD “small free space” frames where the CPU sits directly in front of the airbox where on the 990 ADV there’s plenty of space for an 80mm diameter huge filter.
WARNING:
Do not cut the hoses too short, allow at least 200mm play to allow the filter to be purged from air once mounted.
On the ADVENTURE, where the pump is low in the left tank, the hose from the pump will run on the left inside the frame close to the airbox, while the hose going from the in-line filter to the airbox wil run on the right between fram and airbox, than below the airbox between the cylinders, and again in the airbox with the correct angle to avoid bending or hose restrictions.
You will remove the original hose with male quick disconnect from the airbox, throw away the elastic original clip. With care, it is fragile, pray-open the Oettiger clip, cut the hose lenghtwise to free the quick disconnect and mount it on the new hose with a new clip, either INOX screw type, or new Oettiger, your choice.
While inserting the hose back in the airbox through the gasket, oil it properly to avoid to flip it out of its position and allow plenty of dirt in the airbox from below:
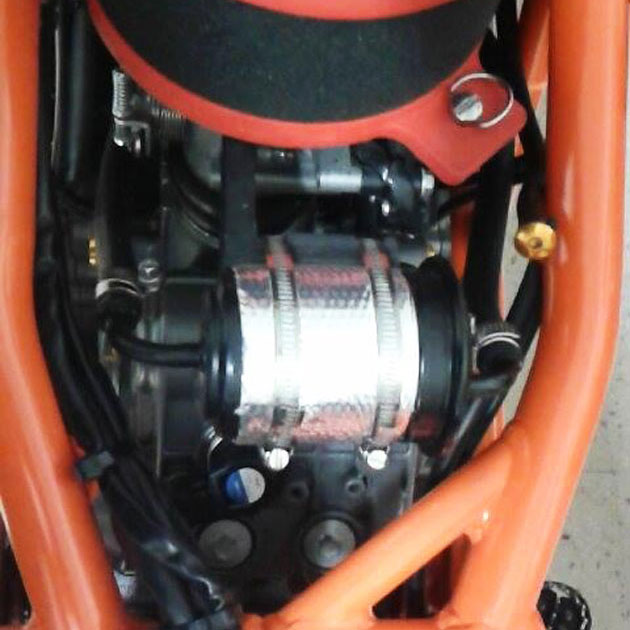
Cut a piece of 21? old inner tube, or use some other heat resistant material, to shield the filter and avoid its rubbing against the frame or metal parts or cables :) Tie the filter to the frame with simple cable ties, or what will suite better the chosen position.
WARNING:
Never leave any air in the in-line filter, even the smallest quantity may lead to engine switching off or sudden dying, erratic beahviour and problems while riding.
PURGE THE FILTER EVERY TIME YOU WILL UN-PLUG IT OR OPEN THE HOSE.
Connecting and disconnecting of the quick disconnect will not require any purging, unless you will loose much petrol while trying it many times.
In order to purge the filter, (990 ADVENTURE example) lift the filter from its position pulling it toward the back of the bike until it is perfectly vertical so that all the air will be pushed by the fresh petrol to the Throttle bodies and will be then expunged from the fuel system.
 In the Picture it is my prototype V6 3.2 liter GMC INOX filter, but the concept is the same :) outlet perfectly vertical.
Now, without switching the engine on, turn the key 5 times allowing for the complete check.
WAIT! Have you put petrol back in the tank??? no?? LAME!!!!!!
OK, after some time you will hear a different sound from the pump, some purging and you will feel the hoses getting harder and moving slightly while doing the pre-check. 5 Times are always more than enough! In case of doubts, 6 or 7 won’t harm much but the battery drain.
Now with the filter still in the vertical position, hit the botton and switch the engine on…. it should run at once without any issue, should it stumble, some air is still trapped, give a bit of gas, little gas … cold engine !!!!!, And it’s gonna be ready.
Now, position the filter in its place and make sure the hose are not bent somehow “closed” by forced position or angles.
For all the 1xxx ( 1050 1090 1190 1290) series mounting is even simplier.
We choose an autopurging filter/position to allow a faster and simplier mounting to enablea direct mounting without a purging unit.
You will NOT need to modify the original hose, re-route it from the Throttle body inlet to the inlet of the filter, left side in the frame as showed is THE POSITION, make sure it will stay vertical, than cut a small lenght of hose and run it from the out-let of the filter back the the throttle body in-let.
As always, shield it with rubber.
Check the clips/clamps twice, mount back the tank, use the purging method (5 times key check), then switch on the engine, done!


We also found another installation for a much bigger filter, hose will be longer and must be re-tuted. However, its access is easier and will allow 10.000 km more of service interval “strech”.


Now, about servicing, compatibility, filter life, Godzilla cleaning and such:
GODZILLA Rally-Raid RACE installation CANNOT BE USED WITHOUT OUR NECK PREFILTERS. It has been designed to allow a better and more free flow of petro to the pump, therefore it mst be protected with the best neck prefileters, namely OURS, and it should not be used without the external in-line unit, the paper joke is no match for the new flow….. so be advised!!!!!!!
All our suggested/sold in-line filter unit have been tested, opened, checked against our needs, standard and flow requirements, are Automotive A grade quality and will last for many thousands more KM than the original set-up.
Depending on the neck filtration level, on the ADV 990 they will last from 50.000 to 70.000 km (M00016 HDM3D or M00016-X-ARM HDM3D X-GEN):
M00016
M00016-X-ARM
SMR/SMT/SM/SD, HDM3D neck filtration, minimum 50.000 km whatever in-line filter unit.
1xxx, due to the smaller in-line filter, we recommend filter changing every 40.000-50.000 km, NEVER OPENING THE TANK AGAIN, simply swap the old in-line filter with the new one, purging procedure anew, and ready in 5 !!! you can do it while checking the air filter.
You can buy the complete GODZILLA Rally-Raid RACE at our on-line shop .
Now, feel the new engine pull smoother, forget forever about clogged filters or overheating fuel pump, and enjoy the sheer power of you KTM.
Ride ON !